

How to Remove Swirl Marks Safely From Your Car

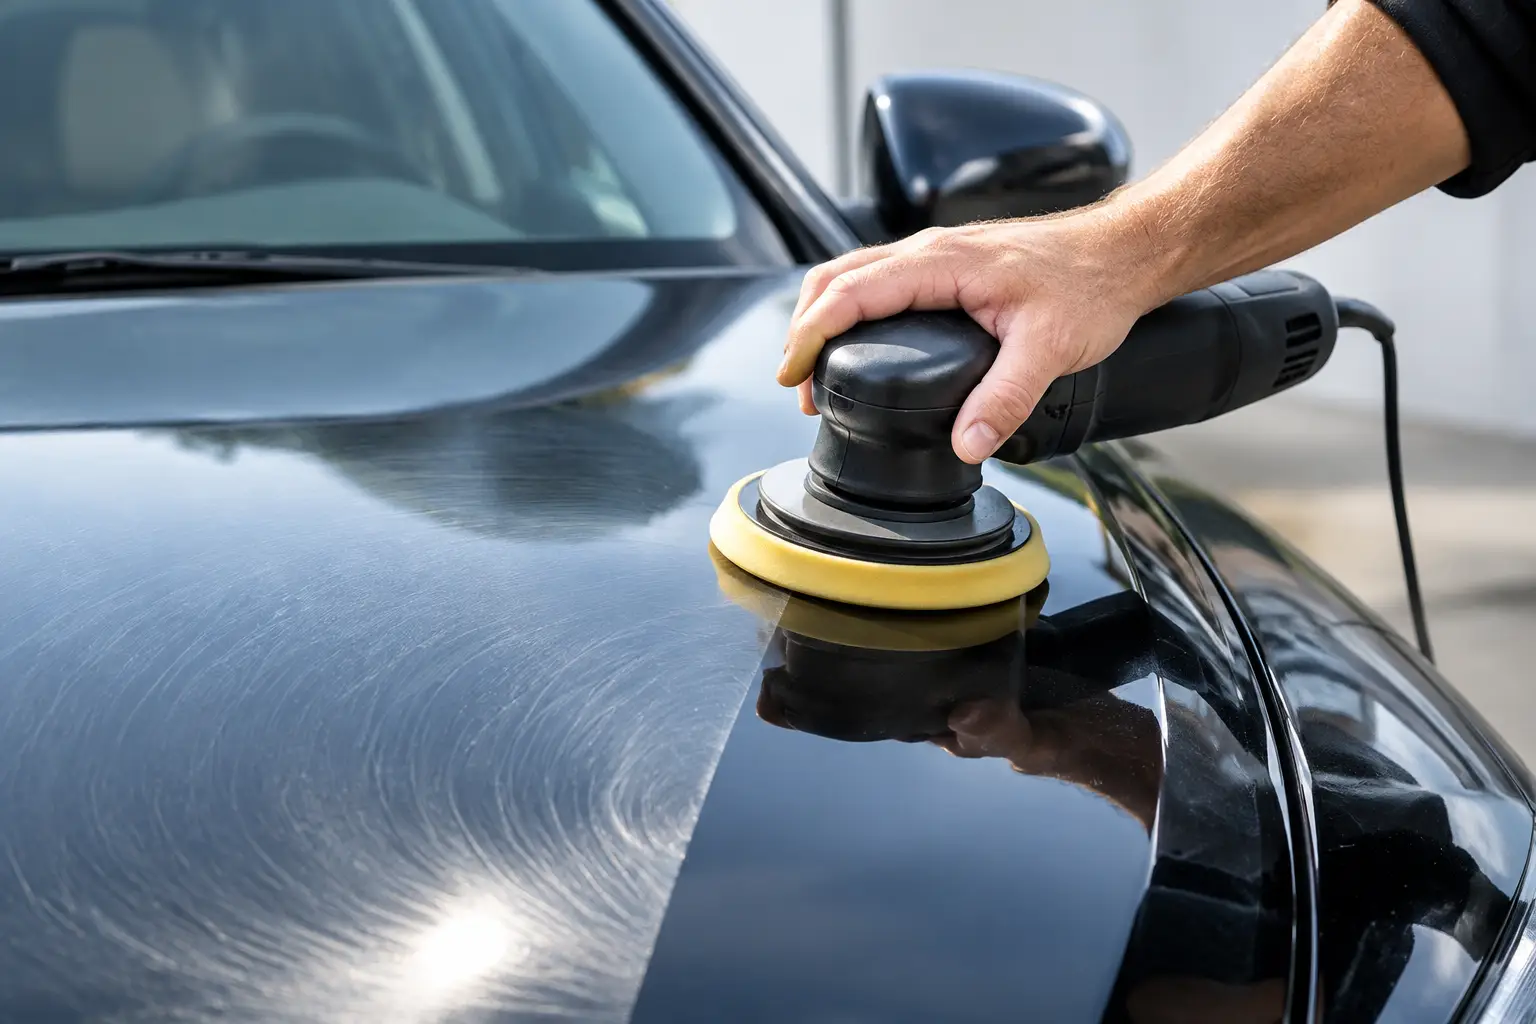
A black bonnet under Singapore sunlight can reveal every careless wash in seconds. Those fine circular trails may look superficial, but they interrupt the clarity, depth and mirror-like reflection that give premium paint its presence. Knowing how to remove swirl marks safely is not about applying the strongest polish available. It is about correcting defects with restraint, preserving as much of the factory clear coat as possible.
Swirl removal is a form of paint correction, not merely cleaning. Done well, it restores gloss while respecting the finite thickness of your vehicle’s paintwork. Done poorly, it can create hazing, uneven finish, burned edges or needless loss of clear coat that cannot be put back.
What Swirl Marks Actually Are
Most swirl marks are not marks sitting on top of the paint. They are microscopic scratches and abrasions within the clear coat, usually caused by contaminated wash mitts, harsh wiping, dry dusting, automatic car washes, or towels that have collected grit. Under direct sunlight or workshop inspection lighting, these scratches scatter light rather than reflecting it cleanly.
The result is paint that looks greyed, dull or covered in cobweb-like patterns, even when the car has just been washed. Dark colours show the issue most readily, although metallic silver, white and lighter finishes are by no means immune.
In Singapore, the problem is compounded by frequent rain, road film, construction dust and high humidity. Owners often wipe water spots or dust from a parked vehicle between washes. That instinct is understandable, but rubbing dry contamination across the paint is one of the quickest ways to introduce fresh marring.
How to Remove Swirl Marks Safely: Assess Before You Polish
The safest correction begins with diagnosis. Not every imperfection should be treated in the same way, and not every panel has the same paint history. A vehicle may have original factory paint on most panels, refinished paint on one door, paint protection film on the front end, or delicate trim beside the area requiring attention.
A professional inspection uses controlled lighting to distinguish light wash marring from deeper scratches, etched water spots, oxidation and random isolated deep scratches. Paint thickness readings provide a further level of confidence, especially on older vehicles, resprayed panels or vehicles that have received repeated polishing over the years.
This stage matters because paint correction involves abrading a very fine amount of clear coat to level the surface around a scratch. For light defects, a finishing polish may be sufficient. For more pronounced swirling, a compound may be required before refinement. The correct choice depends on paint hardness, defect depth, panel condition and the finish expected.
There is a trade-off. Pursuing absolute perfection can require more correction than is wise for a daily-driven car. A considered 80 to 95 percent improvement, with healthy clear-coat preservation, is often the more valuable outcome. The finest detailers know when to stop.
Begin With a Decontaminated Surface
Polishing dirty paint is never safe. Before any machine touches the surface, the vehicle should undergo a careful wash that removes loose dirt without dragging it across the finish. This is followed by chemical decontamination to dissolve embedded iron fallout and road film, then physical decontamination where appropriate to remove bonded contaminants.
This preparation creates a clean, smooth surface that allows polishing pads to work predictably. It also prevents particles from being trapped in the pad and reintroduced as scratches during correction.
Drying deserves equal care. Use clean, high-quality microfibre drying towels and gentle blotting or controlled passes rather than aggressive rubbing. If water behaviour suggests old protection has failed, that is useful information for planning the final protection stage, but it should not be mistaken for a measure of paint health on its own.
Choose the Least Aggressive Effective Method
Safe swirl removal follows a simple discipline: start with the mildest combination capable of delivering the required result. This means testing a small, representative section first, often called a test spot, before committing to an entire vehicle.
A detailer may begin with a fine finishing pad and polish, inspect the results, then increase cut only if defects remain. If a stronger compound is necessary, it is normally followed by a refining stage to restore sharpness and eliminate the haze that heavier correction can leave behind.
Machine choice also matters. A dual-action polisher offers a forgiving movement that reduces the risk of concentrated heat compared with inexperienced use of a rotary machine. That does not make it risk-free. Poor pad control, excessive pressure, dirty pads and repeated passes can still compromise a finish, particularly around body lines, panel edges and delicate contours.
Hand polishing has its place for tight areas and extremely light marring, but it rarely delivers uniform correction across a full vehicle. It can also tempt owners to rub the same spot repeatedly in pursuit of a defect that needs a more measured professional approach.
Technique Protects the Paint You Cannot Replace
Correcting swirls safely is as much about process control as product selection. Pads must be clean, primed correctly and changed or cleaned throughout the job. A saturated pad loses effectiveness, generates more heat and can mar the surface it is meant to refine.
Polish should be worked in manageable sections, with regular inspection after residue removal. The operator monitors panel temperature, avoids lingering on edges, and keeps the machine pad flat wherever possible. Trim, badges, rubber seals and vulnerable edges should be masked before correction begins.
Lighting is not optional. Paint can appear flawless under diffuse workshop illumination yet show heavy holograms in sunlight. Proper inspection uses multiple light sources and viewing angles to verify that defects have been removed rather than temporarily concealed by oils or fillers in the polish.
This is why a quick, low-cost “buff and shine” can disappoint after the first wash. A surface may look glossy at collection, then reveal the same swirls once temporary fillers dissipate. Genuine correction is judged by clarity after preparation, refinement and inspection, not by immediate shine alone.
Protect the Corrected Finish
Once swirls have been removed, protection is what preserves the investment. Bare, freshly corrected paint is more exposed to contamination, UV stress and the routine contact that gradually recreates wash marring.
A quality paint protection coating can enhance gloss, improve chemical resistance and make routine washing easier, provided the paint is properly prepared and the owner follows suitable maintenance practices. For areas exposed to stone chips and physical abrasion, paint protection film offers a different category of defence by creating a sacrificial barrier over vulnerable paintwork.
Neither option makes a vehicle immune to poor washing. Protection reduces the burden of maintenance and helps retain the corrected appearance, but abrasive contact will still mark any automotive surface over time. The lasting result comes from combining professional correction with disciplined care.
Change the Wash Routine That Created the Swirls
The most effective way to avoid another correction is to eliminate the habits that caused the damage. Never use a dry towel to wipe dust from the paint. Avoid household sponges, old rags and wash mitts that have fallen onto the ground. Keep wheel tools separate from paintwork tools, because brake dust and road grit are especially abrasive.
Use a pH-balanced car shampoo with ample lubrication, rinse thoroughly before contact washing, and clean from the upper panels downward. Wash mitts should be rinsed frequently and laundered after use. Dry with dedicated microfibre towels that are clean, soft and free from fabric softener residue.
Automatic brush washes are best avoided for vehicles where paint clarity matters. Their brushes may carry debris from earlier cars, and repeated friction leaves a predictable pattern of fine scratches. Touchless washes reduce contact but may not remove all traffic film, so they should be viewed as a maintenance option rather than a complete answer.
For owners who value a consistently pristine finish but have limited time, scheduled professional maintenance is the sensible middle ground. It provides controlled washing, periodic inspection and early intervention before light marring progresses into a more extensive correction requirement.
When Professional Paint Correction Is the Better Choice
DIY correction can be appropriate for enthusiasts prepared to learn on a suitable vehicle, invest in proper tools and accept a gradual learning curve. However, luxury finishes, complex bodywork, soft paints, matte surfaces, older repainted panels and vehicles with uncertain history all warrant experienced assessment.
Professional paint correction brings inspection lighting, paint thickness measurement, calibrated product systems and the judgement to select a safe correction level. At EA Detailer, the objective is not simply to make a car look polished for a day. It is to restore visual purity while protecting the long-term integrity and value of the finish.
A beautifully corrected vehicle changes the ownership experience every time the light moves across its panels. Preserve that clarity with careful washing, considered protection and correction that treats factory paint as the irreplaceable asset it is.

Leave a Reply